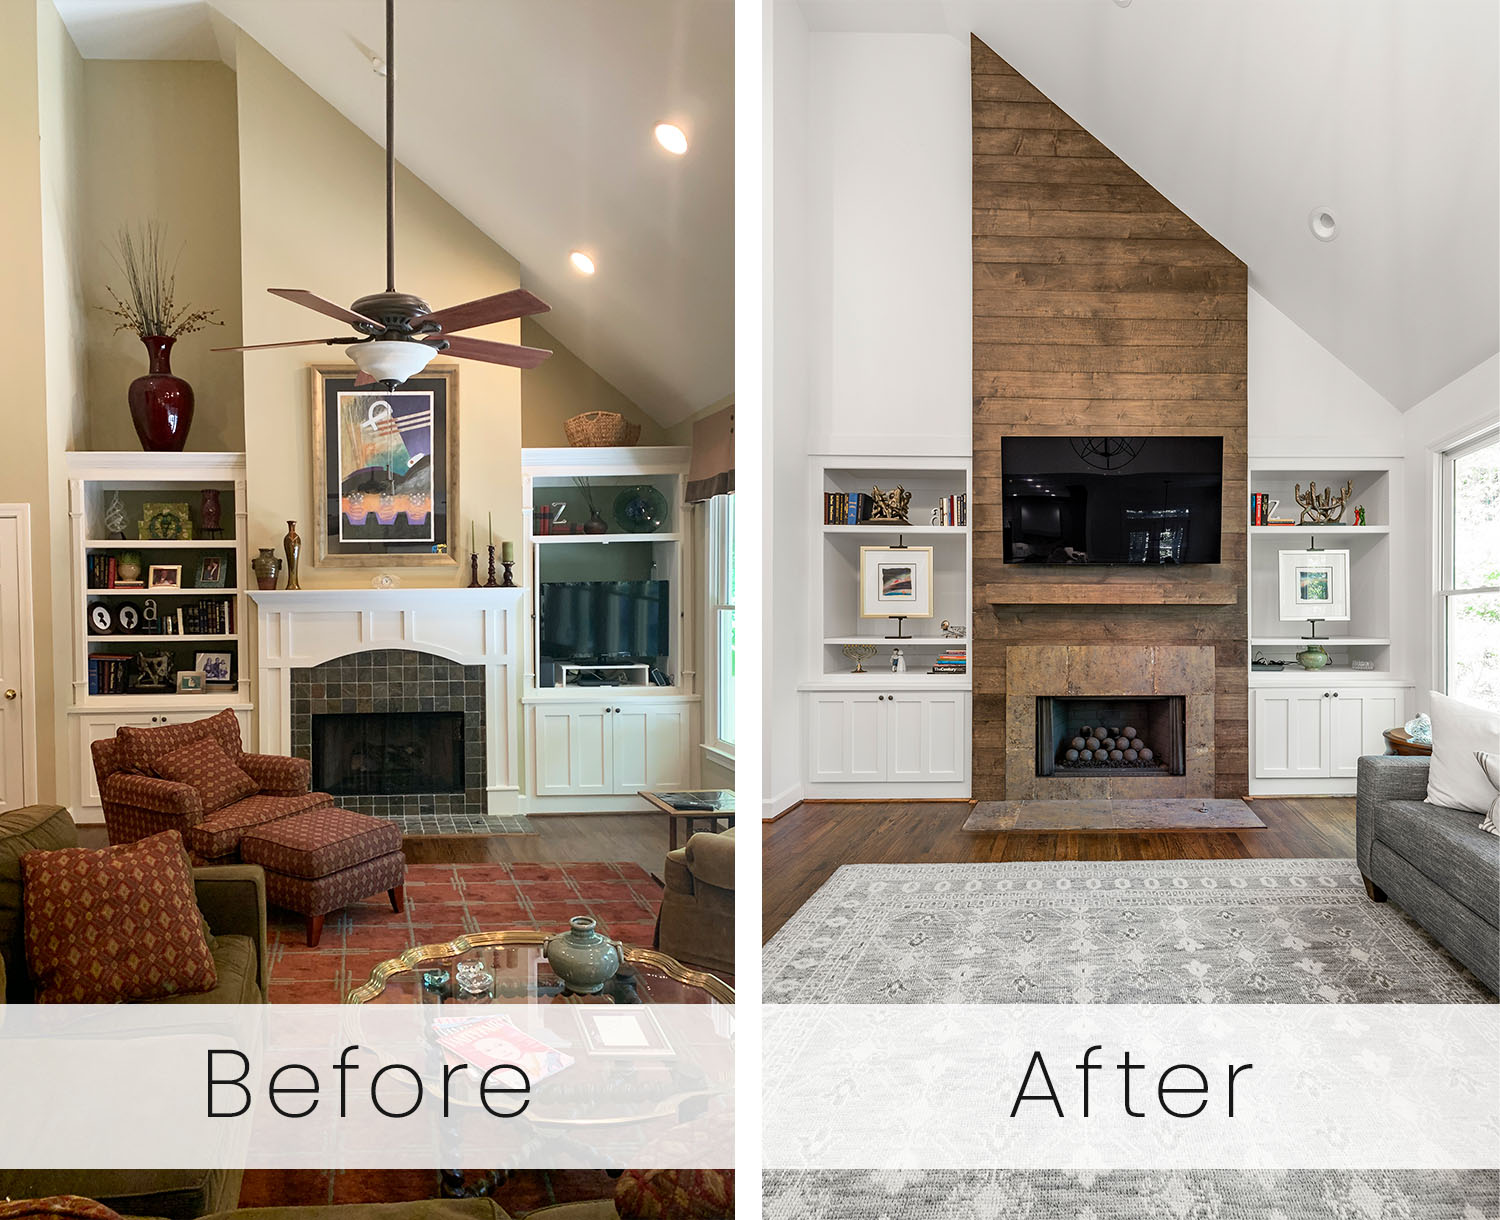
Think changing just one element in a room isn’t enough to make a noticeable difference? Think again! This fireplace wall transformation turned a dated family room into an updated gathering spot the whole family loves.
The Challenge
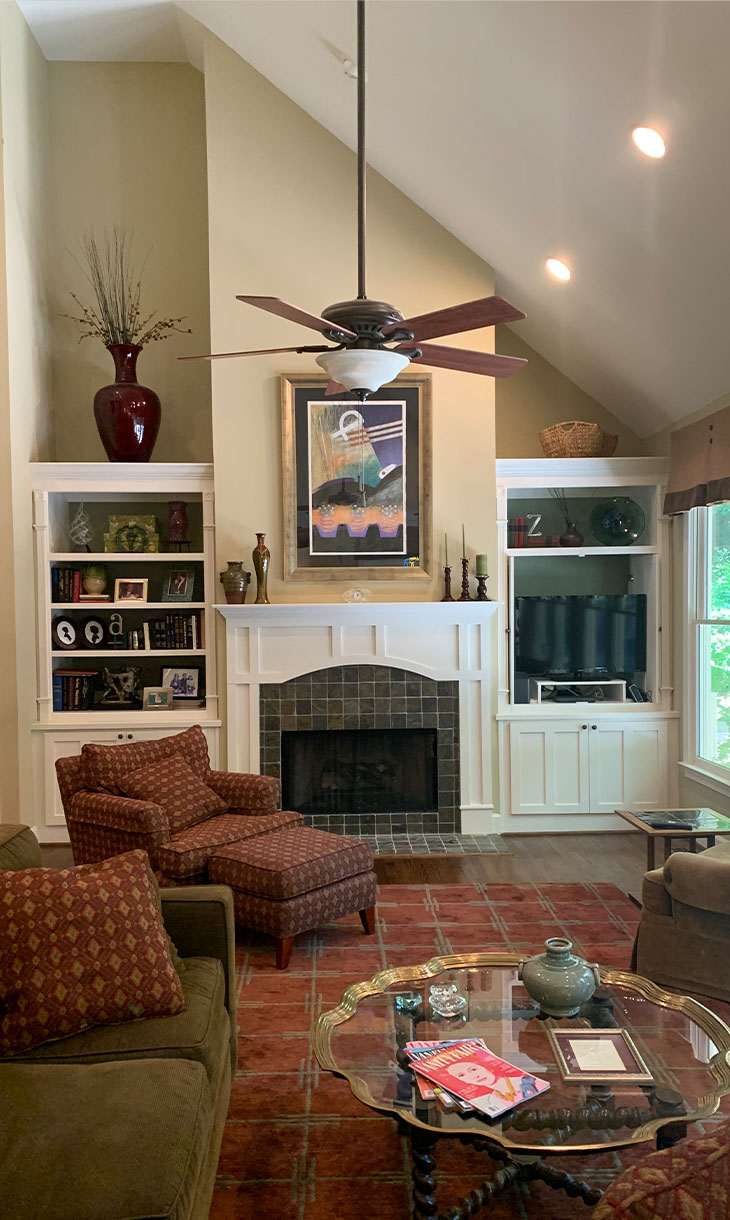
Our client was feeling uninspired by her dated family room for a number of reasons.
- The room’s traditional fireplace mantel and matching shelving on either side projected a dated, country feel.
- The open spaces above the built-in shelving made the space feel choppy and disjointed.
- The mantel was too high to hang a TV above it so the TV was positioned awkwardly in a corner. Because of its placement inside a cabinet, the TV itself was too small for the size of the room.
- The wall and furniture colors were drab and outdated.
The Process
One of the first things we do with any project is to understand our client’s priorities and pain points. This information, along with budget parameters, allows us to make recommendations for how our client can get the most bang for the buck.
During the initial site visit, our client made it clear that the overall priority was addressing the room’s appearance and layout. She wanted to transform a traditional room that was not conducive to conversation or television watching into a modern, comfortable space everyone wanted to spend time in.
With this information we knew, for example, that while the fireplace itself may not run on the latest and greatest technology, it worked just fine and we did not need to spend money replacing the firebox or ventilation system. Instead, we could put the budget toward making everything around the fireplace look great to better meet the family’s needs.

The Solution
To achieve our client’s goals and stay within budget, our recommendation focused on maintaining the parts of the wall that worked well and upgrading the parts that didn’t.
Specifically, we were able to minimize cost by keeping the following elements as-is or making minor adjustments:
- Firebox and ventilation: As we noted above, the fireplace itself worked and the client did not want to devote budget to replacing its functional components.
- Built in cabinets and shelving: We kept the existing base cabinets and modernized the look of the doors by removing the trim detail and replacing the door hardware to create clean lines and a neutral appearance. The shelves above the cabinets needed nothing more than some height adjustment and accessorizing.
We focused our upgrade on these high-impact areas:
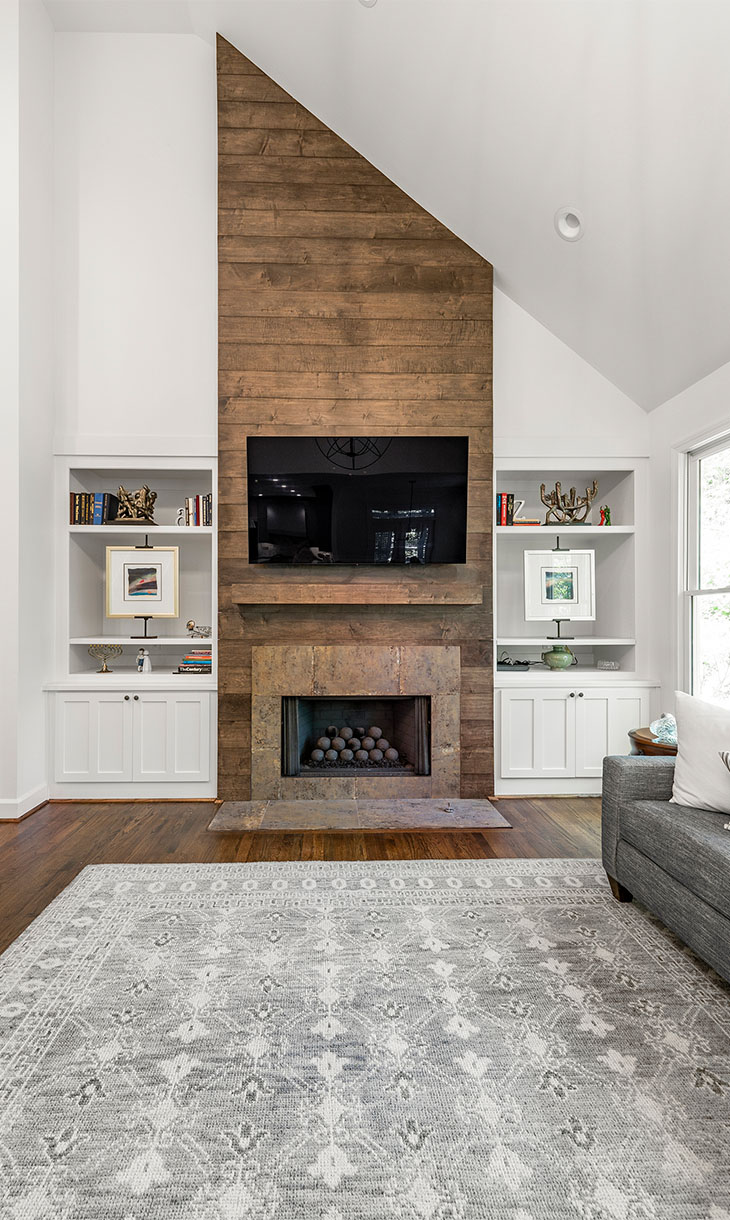
- Framing in the open spaces: In addition to being big dust collectors, the empty spaces to the upper right and left of the fireplace wall weren’t serving a purpose or doing the room any favors. The tall asymmetrical spaces felt uncomfortable to the eye because they were awkwardly scaled and added unnecessary complexity to the wall. Continuing the fireplace wall depth across the whole wall simplified the architecture and contributed to a cleaner, polished look.
- Fireplace tile: A simple, large-scale pattern works best in a large scale room. We replaced the original small fireplace tiles installed with large grout joints with large porcelain tiles installed with small grout joints. The new large tile/small grout joint combination allowed us to push tiles close together so the fireplace surround appears to be comprised of large pieces of stone rather than a busy tile pattern. The high-end result is eye-pleasing, sophisticated, and sleek.
- Mantle and wood paneling: We replaced the three-sided traditional mantle with a modern floating mantle shelf and extended the stained wood paneling from the floor to the ceiling. Since the mantle is now separate from the fireplace surround, we were able to position it low enough to place a new larger TV above it. The wood paneling adds a contrasting texture against the white walls and provides a dark background to deemphasize the television.
- Paint: We replaced the drab yellow paint with a fresh, bright white. We used the same white shade on the walls, trim, and ceiling to create a cohesive feel throughout the room.
The before and after photos really speak for themselves!